How to Import a YouTube Playlist into Obsidian (Step-by-Step Guide)
Obsidian has become very popular in the Personal Knowledge Management (PKM) space. Many people call it a “second brain” because it helps you create a connected system of notes using simple Markdown files.
The biggest advantage of Obsidian is that it is local-first. This means all your data stays on your own computer. Because of this, it is fast, private, and you don’t have to worry about losing access in the future.
Whether you are a student, developer, or someone learning from online courses, Obsidian can really help you organize your knowledge properly.
Now, if you are following a YouTube course or any learning playlist, just watching videos is not enough. You need a system to store and revisit that content. That’s where combining YouTube playlists with Obsidian becomes very useful.
When you bring video links, titles, and notes into Obsidian, you can:
- Keep all your learning in one place
- Add your own notes alongside videos
- Use graph view to see connections between topics
- Quickly search anything later
Here is a straightforward guide on how to import a YouTube playlist into Obsidian in 6 simple steps.
NoteThe screenshots below are from a Windows desktop, but the process is exactly the same for macOS and Linux.
Step 1: Export Your YouTube Playlist as a Markdown File
The first step is to get the data from YouTube. I have already written a very detailed step-by-step guide on the home page about how to use our extractor.
Go to our home page, paste your playlist link, and select Markdown (.md) from the "Export As" menu. Your browser will download a file containing all the video metadata cleanly formatted for Obsidian.
Step 2: Open Obsidian and Create a New Vault
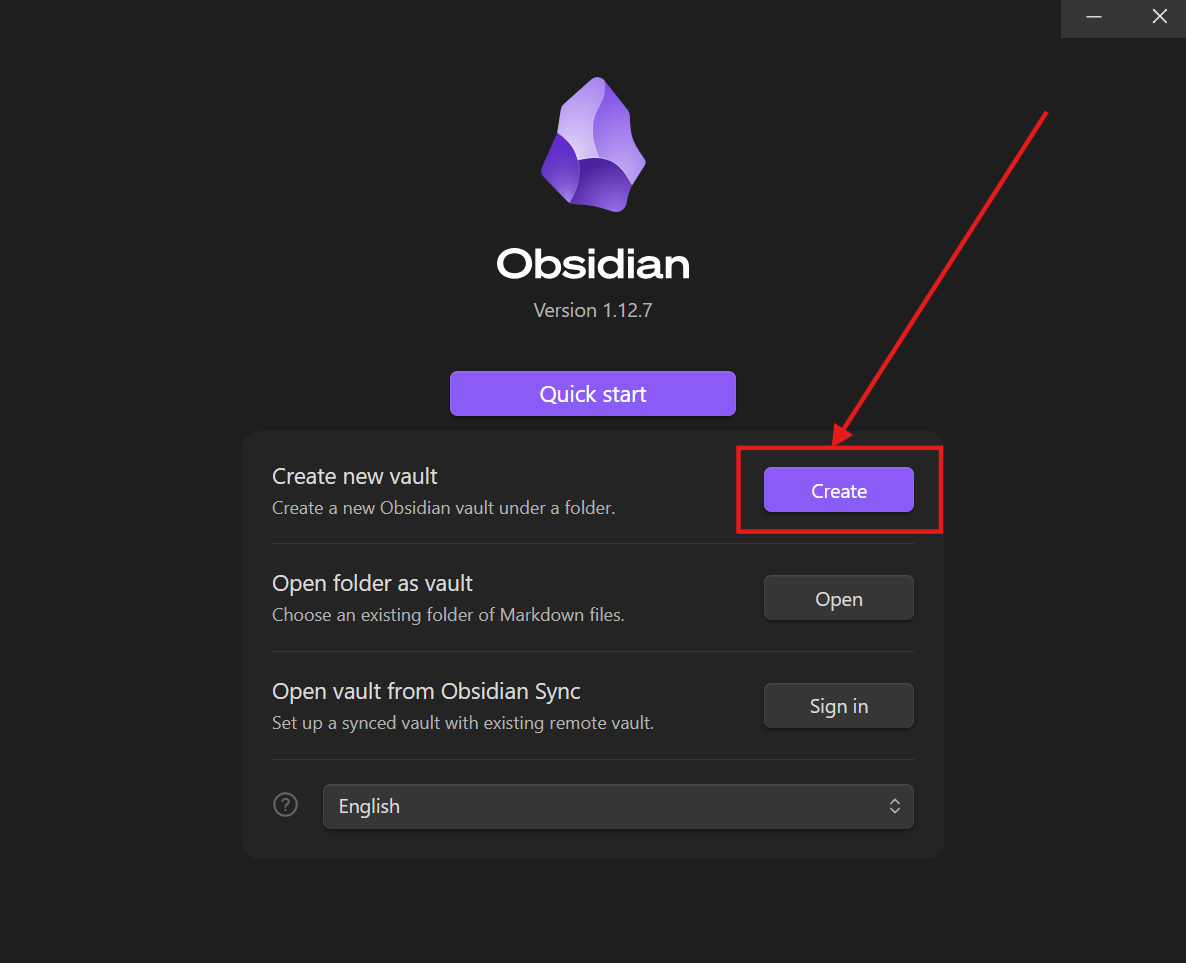
Open the Obsidian app on your computer. If you are a new user, you will see a "Quick start" screen.
Look for the "Create new vault" section and click the Create button. If you already have a vault, you can skip this step and simply open your existing vault folder in Step 4.
Step 3: Name Your Vault and Choose a Location
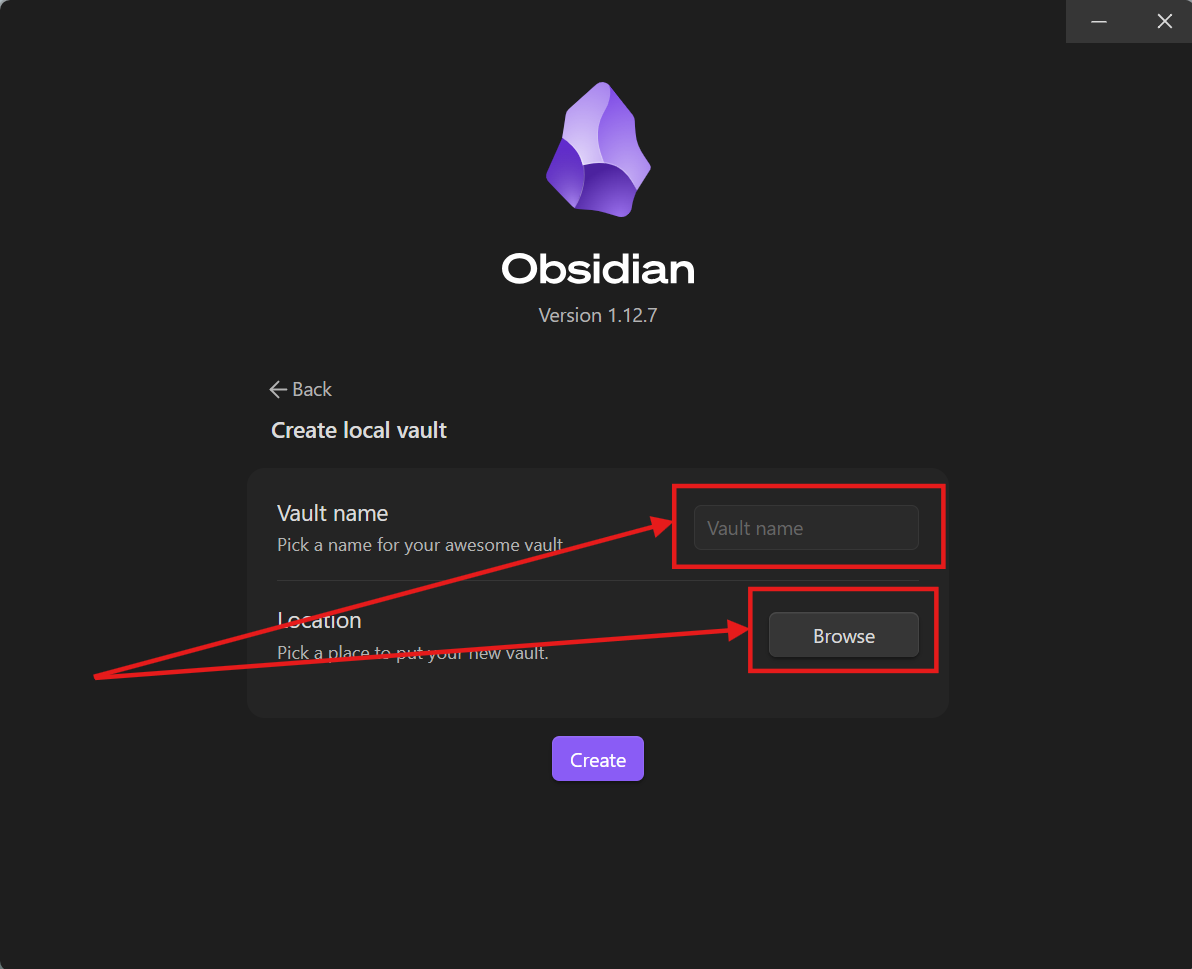
Now, give your new vault a meaningful name (e.g., "Study Notes" or "YouTube Courses"). This is kind of grouping your notes in Obsidian.
Click the Browse button to choose a folder on your computer where your notes will be stored. Once selected, click the Create button at the bottom.
Step 4: Identify Your Vault Folder
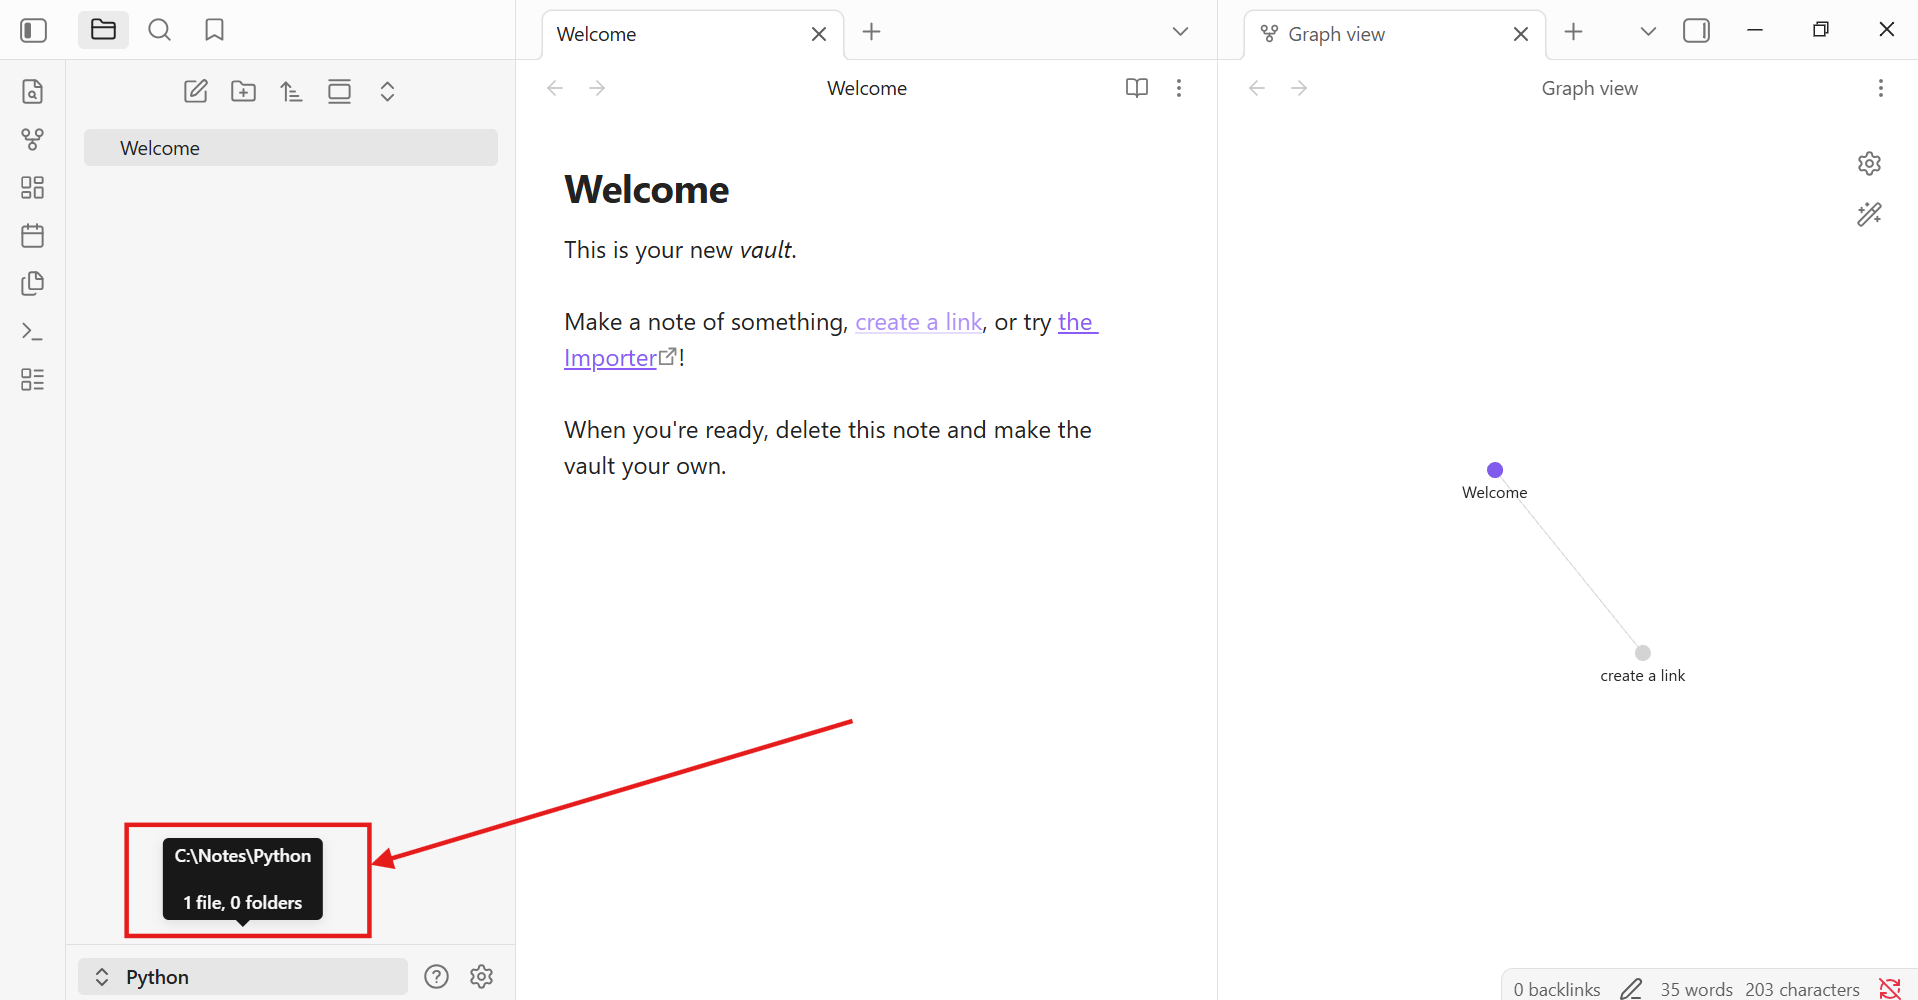
Your new vault is now ready! Obsidian is essentially a "window" into a folder on your hard drive.
To see where your files are actually stored, you can check the vault path. In this example, my vault is located at C:\Notes\Python. You will need this path for the next step.
Step 5: Copy the Exported Markdown File into Your Vault
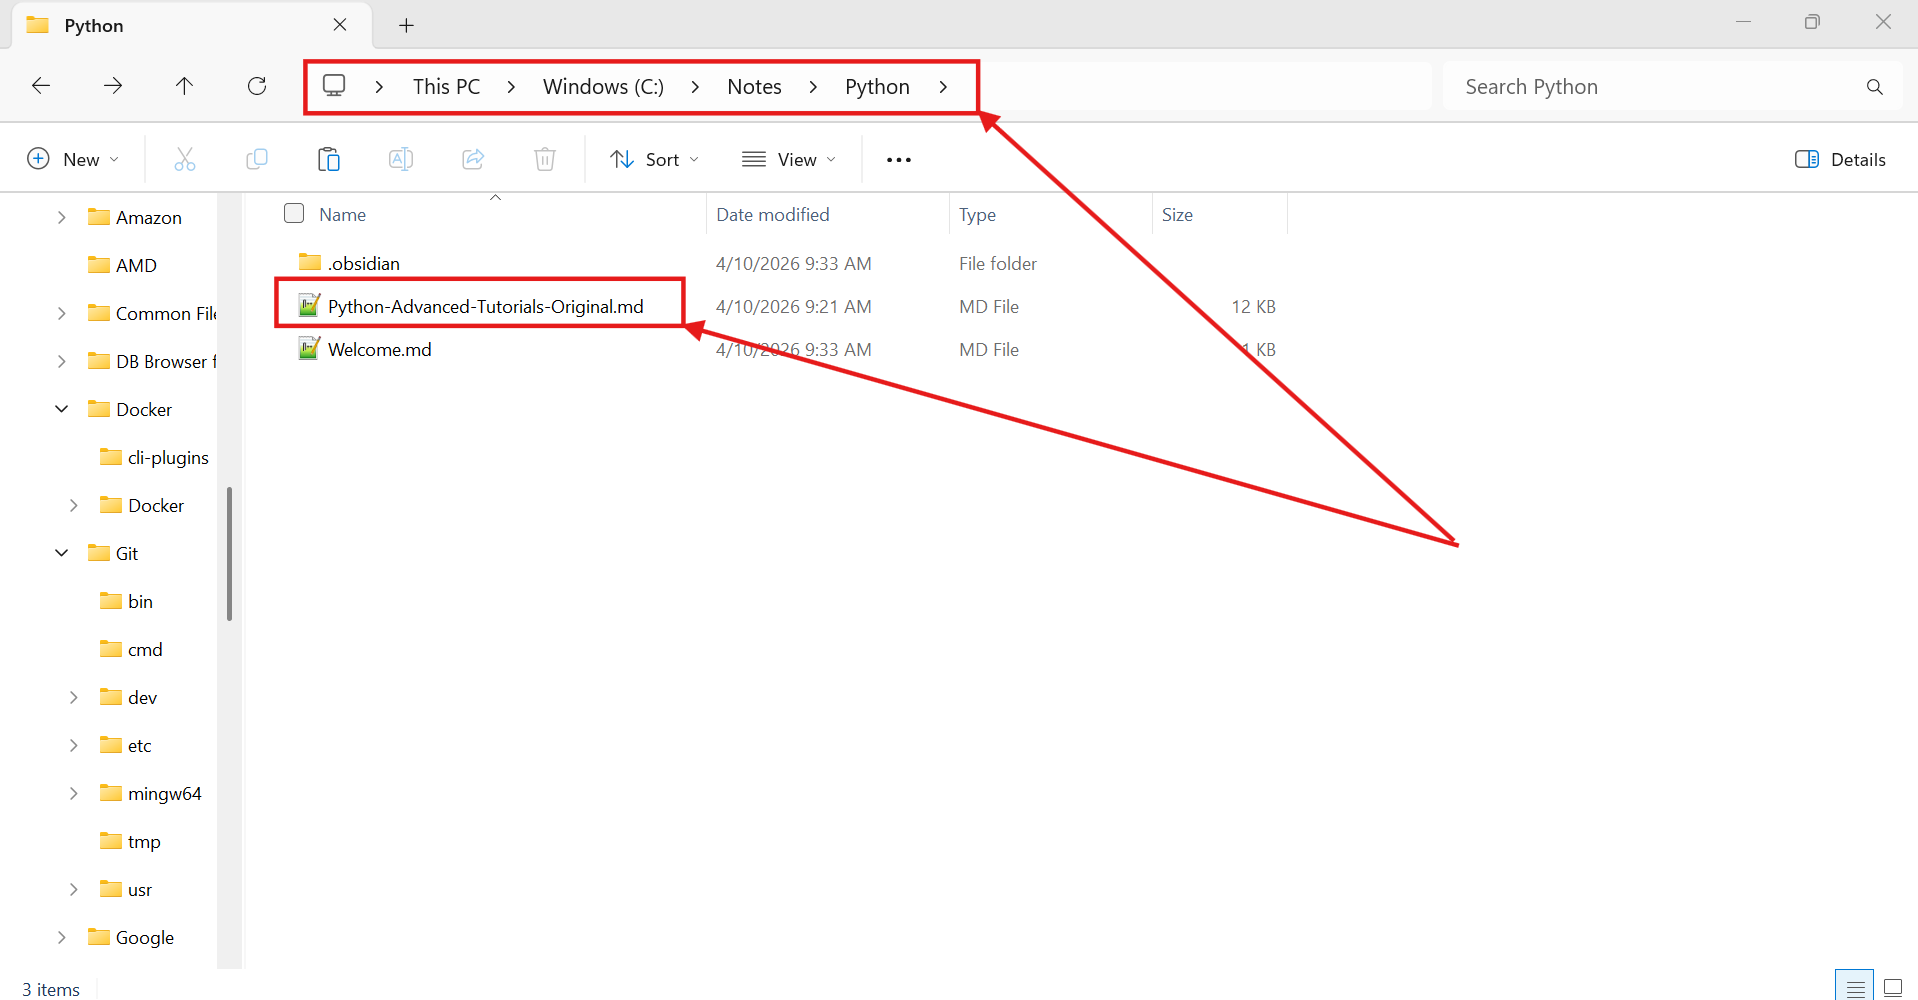
Now, open your file explorer (Windows Explorer or Finder) and navigate to the folder you just identified.
Find the .md file you exported from our tool in Step 1 and simply copy (or move) it into this vault folder.
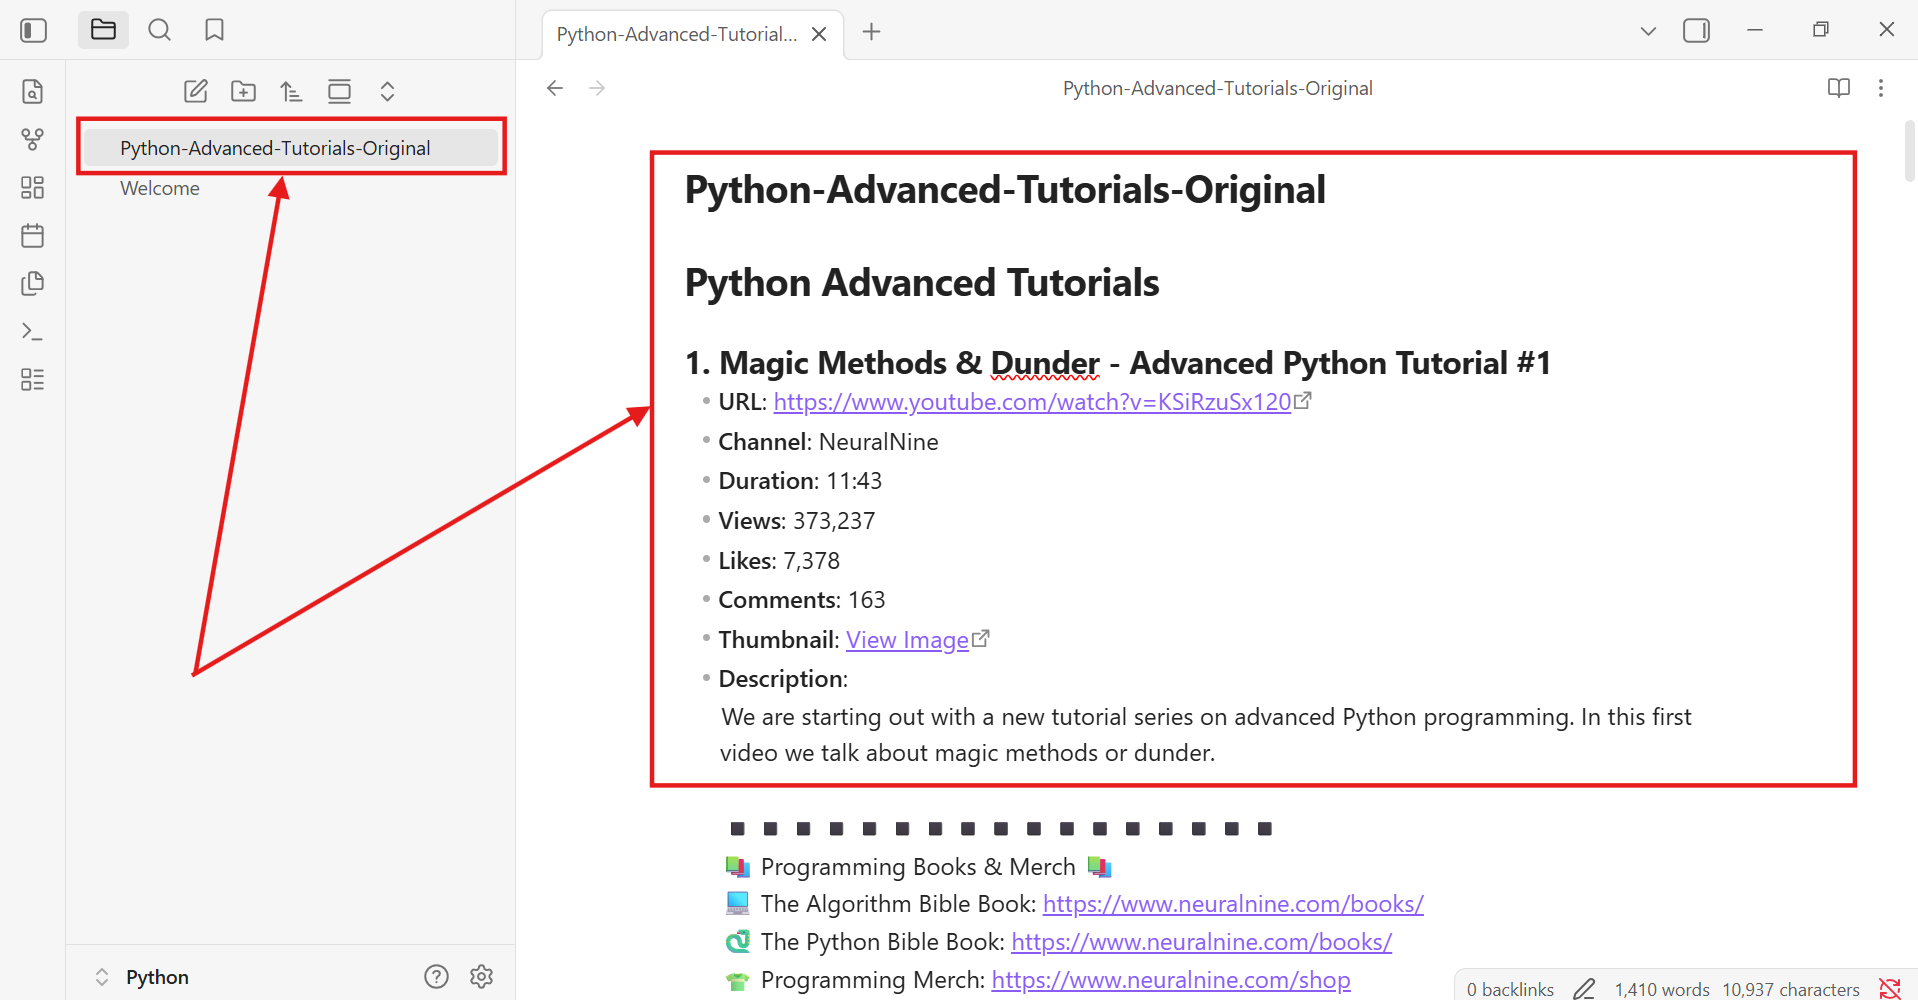
Step 6: View Your Playlist in Obsidian
Go back to the Obsidian app. You will see that the new file has instantly appeared in your sidebar!
Click on it to open. Because our tool exports data in high-quality Markdown format, Obsidian will render the video titles, clickable URLs, durations, and descriptions in a beautiful, structured list.
Why This is Better Than a Simple Link List
By importing your playlists into Obsidian, you're not just saving links; you're building a searchable asset. You can now use Obsidian's powerful features to:
- Link Notes: Create [[ Internal Links ]] to other notes related to a specific video.
- Add Tags: Use #tags to categorize videos across different playlists.
- Search Everything: Use the global search (
Ctrl+Shift+F) to find specific topics discussed in video descriptions across your entire library.
This workflow turns a passive "watch later" list into an active, searchable "second brain" for your learning journey!